Thursday, 12 October 2017

666 Runs

After almost a year sitting in a garage the MC22 has finally had its dignity restored.

Handling has improved by a mile in comparison to what it used to be thanks to the front suspension and weight changes. The higher rearset positioning provides a more aggressive body position over the bike which is far more enjoyable for cornering (not to mention eliminating peg scrape), and when coupled with the weight loss from the fibreglass fairings, exhaust and other small reductions it really does feel stupidly nimble.

In terms of engine performance it's running rich with the 115/118 size jets and the pilot mixture screws do need further adjusting. The exhaust constantly pops at midrange rpm and blows flames at higher rpm, which is likely unburned fuel just being dumped into the exhaust and igniting. Whether or not the full titanium system is contributing to that is another story but it's definitely down on torque.

The 14-53 gearing suits tight sections of road and small circuits as expected. To compare with stock gearing- 6th gear at 100km/h is 9,000rpm, which is now instead 80km/h and the top speed has reduced to 161km/h on limiter. Somewhere in the middle, say 47T or slightly smaller would be a good future rear sprocket replacement; but for now it's great fun in tight twisties.

The style of the bike was heavily influenced by the バイク 走り屋 era- a period during the 80's/90's that involved teams of young motorcycle enthusiasts who would race on public roads in Japan.
Below is a list of aftermarket parts used in the build:

DOMINO Road Racing Grips
ECLIPTECH LED Brake Light
EK CHAINS 520SRX2 Chain
FANATIC Short Type Bar Ends
HEL Braided Brake Lines
HRC Rear Reservoir Delete Kit
KKK PRODUCT Preload Adjusters
KN PLANNING Switch Kit
KOSO RX2N & LCD Multimeter
KOSO Super Slim Style Voltmeter
METALGEAR 53T 520 Rear Sprocket
METALGEAR Front Brake Rotors
MOTOGEAR 4-1 Type Prism Full Titanium Exhaust System
N PROJECT Wide View Assist Mirrors
POSH Aero Sharp Mini Blinkers
SILHOUETTE JAPAN Cowl
SSB POWERSPORT Lithium Battery
SUNSTAR 14T 520 Front Sprocket
TYGA PERFORMANCE 30mm Mirror Blanking Plates
TYGA PERFORMANCE Front Fender
TYGA PERFORMANCE Rear Stand Hooks
XCITEBIKES Adjustable Levers

*All other parts are either unbranded, custom or OEM.

Sunday, 1 October 2017

Switchgear and Thermo Fan Manual Switch

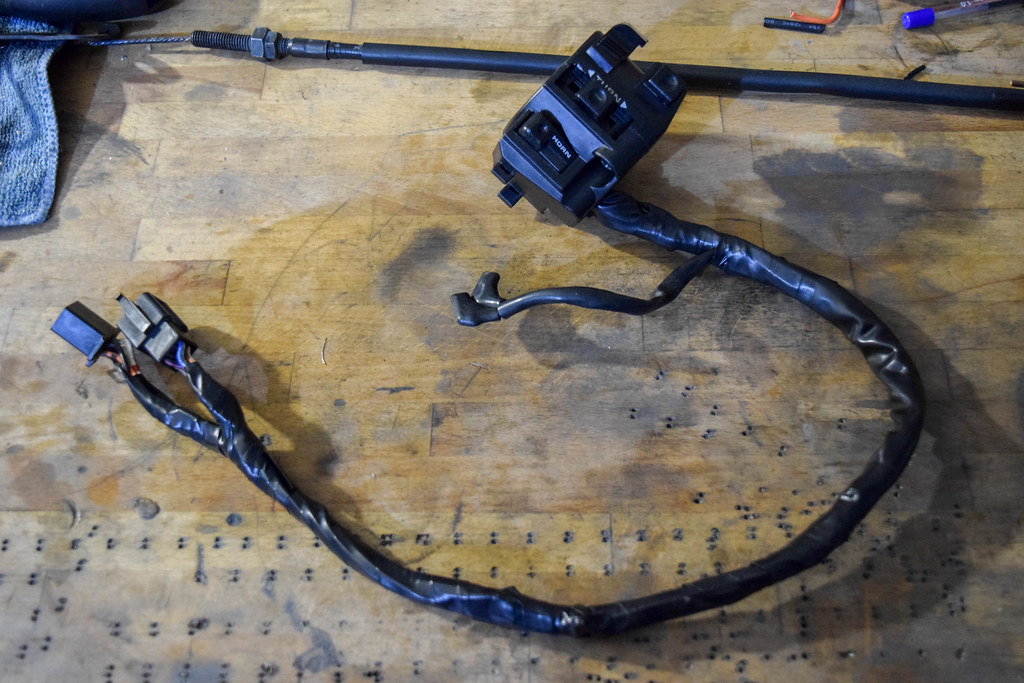
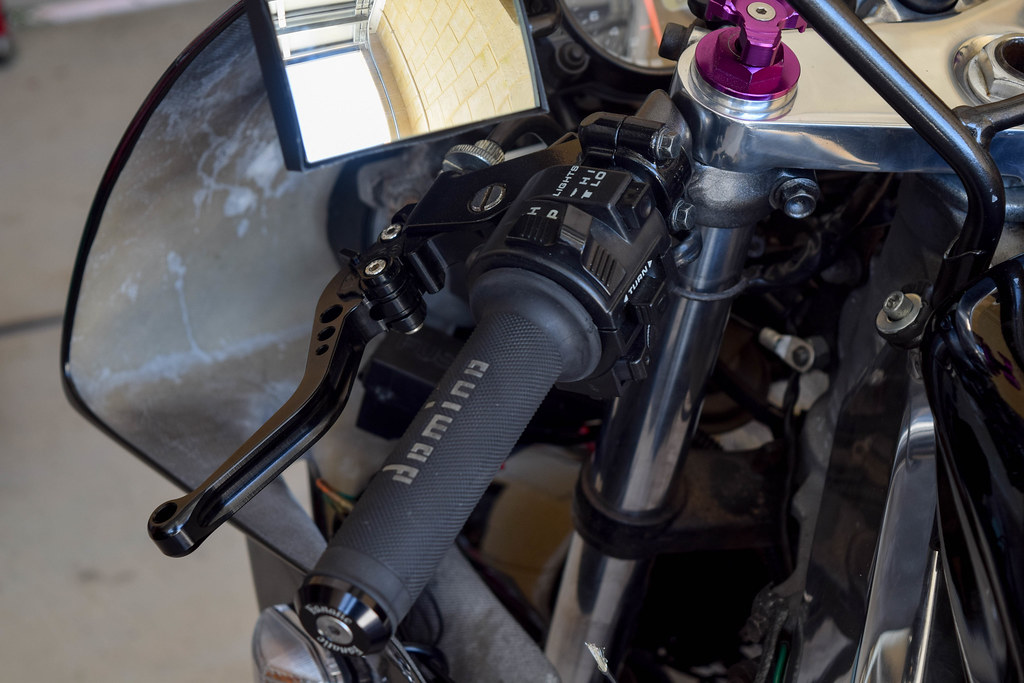
Grey import switch gear for these bikes don't exist as new stock anymore and second hand units are usually in poor condition. I used a generic 5/8" switch gear from Ebay as an alternative which is cheap and works perfectly. The manufacturer from china has basically just reverse engineered a honda switch gear so all the internals are wired the same, just different plugs and colour wiring. All that was needed to do was transfer the clutch switch wiring, oem plugs and match up the wires to their functions.

New Ebay switch gear - Straight out of the box

Loom for the switch gear organised and ready for the plugs to be soldered
Switch gear all soldered and taped, ready to go on the bike
Switch gear installed
Another electrical change was to the thermo temperature switch. A common fault on these bikes is the temperature switch that sits on the bottom left of the radiator fails and ultimately stops the thermo fan from ever turning on- no longer cooling the bike while stopped or at low speed. Installing a manual switch is definitely one of the easiest modifications that can be done on these bikes.

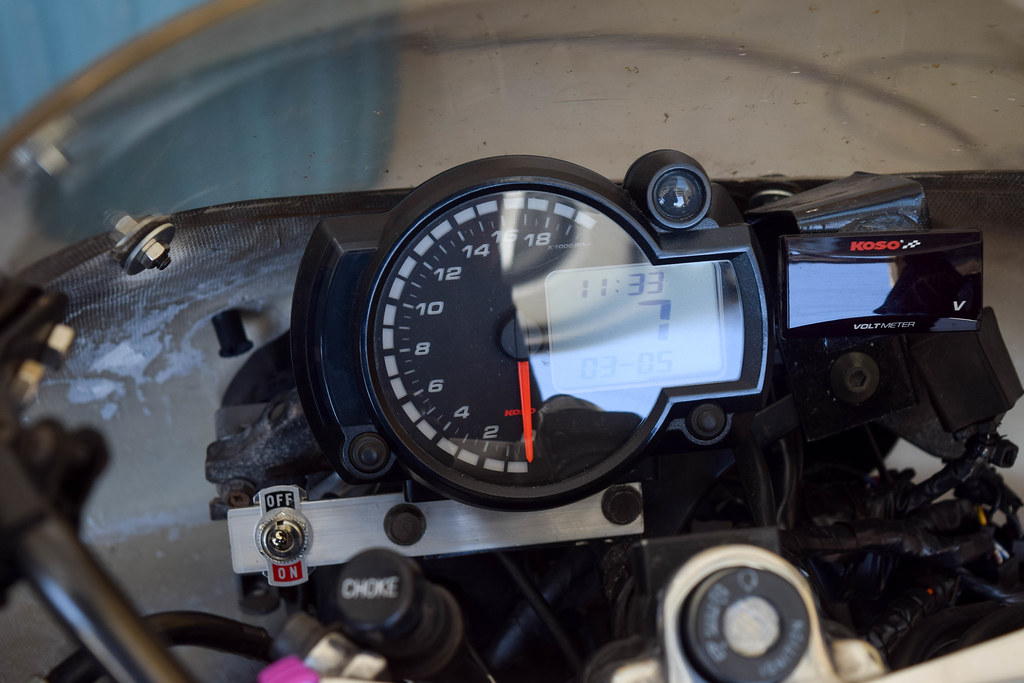
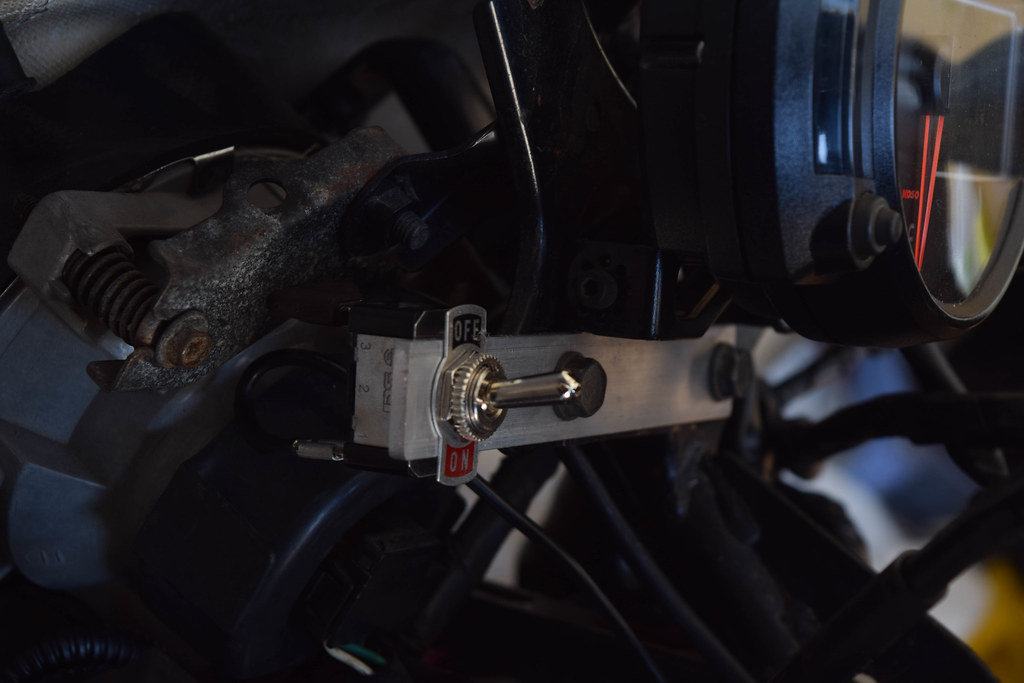
A new bracket for the KOSO dash was made up which has space for a SPST 2 position switch.

Manual switch insalled
The wire connected to the temperature switch on the radiator was unplugged and runs over the top of the bottom triple, connecting to the 'off' side of the switch. From there a new wire runs from the 'on' side of the switch to one of the fairing stay bolts, earthing it on the frame of the bike.

Switch complete


Monday, 25 September 2017

Fairings Painted

Thanks to K&F Customs Panel & Paint for their hard work repairing all the small fibreglass imperfections and working their magic with the paint. The colour choice was Mazda Brilliant Black with a layer of silver flake over the top. POSH Aero Sharp indicators and N PROJECT mirrors were installed at the same time too.

Full fairing kit on/off:


Closer details:


Friday, 15 September 2017

General Servicing

With everything else on the bike sorted the remaining running gear needed to be serviced. This included the battery, spark plugs, brakes, brake lines, brake fluid, rear brake reservoir, coolant, engine oil and oil filter. Other things that will need to be addressed in future are tyres and front brake pads.

To start, the engine was serviced with full synthetic Penrite 10w-40 oil and a Hiflofiltro HP111 oil filter.


In order to clean the coolant system a 50/50 mix of cleaning vinegar/water was ran at operating temperature, then a second time with just water to flush the system before finally being filled with Toyota Red coolant. A new coolant overflow bottle was made up too, mounted from a bracket behind the radiator to replace the original overflow tank that usually sits behind the engine.


The original battery dropped a cell on the first attempt to turn the engine over so a replacement was needed. Lithium batteries are surprisingly cheap now and weigh about 1/3 of a normal liquid battery, making the SSB Powersport Lithium battery a great replacement. I also replaced the spark plugs with NGK Iridium CR9EHIX-9 spark plugs which are less prone to fouling.


HEL braided lines were fitted including a HRC rear brake reservior kit before both systems were filled and bled.


Wednesday, 6 September 2017

Valve Clearance Check

After all the effort put into getting things perfect on this bike, it was always going to be impossible to have peace of mind without making sure the valve clearances were within spec; even if the adjustment on the previous engine came to unfortunate outcome due to my mistake. Thankfully the clearances had been done fairly recently on this motor as they were all within spec and the cams, holders and shims could all stay where they were.

For reference, these were the measurements:

CYLINDER 1:
Exhaust (1, 2): 0.229, 0.229
Intake (3, 4): 0.178, 0.152

CYLINDER 2:
Exhaust (1, 2): 0.203, 0.203
Intake (3, 4): 0.178, 0.178

CYLINDER 3:
Exhaust (1, 2): 0.229, 0.229
Intake (3, 4): 0.178, 0.178

CYLINDER 4:
Exhaust (1, 2): 0.203, 0.229
Intake (3, 4): 0.178, 0.178

ACCEPTABLE TOLERANCE:
Exhaust: 0.200 - 0.260
Intake: 0.130 - 0.190


Friday, 1 September 2017

Rearset Modification

The stock rearsets can become problematic when it comes to full lean clearance and while they do pivot to adjust for this, personally the idea of scraping the pegs doesn't sound like a good time. Originally I planned to go aftermarket but decided instead to use brackets to replicate a similar footpeg position that aftermarket rearsets provide. Cardboard was used to make templates first before being transferred to the aluminum flatbar and cut out to fit. The final result are stock rearsets that now sit 50mm higher and 30mm further back.


Wednesday, 23 August 2017

14/53T 520 Pitch Sprocket Conversion

The stock gearing of the MC22 consists of a 17 teeth front sprocket, 52 rear sprocket and a 428 pitch chain. The existing sprockets were far too worn to use again and after looking at alternatives a 520 pitch conversion seemed a viable choice with lots of sprocket options. I decided to go with a 14 tooth front sprocket paired with a 53 tooth rear and change it in future if it's too ridiculous, this combination provides quicker acceleration while sacrificing top speed. 


The front sprocket is a SUNSTAR 14 tooth paired with a METALGEAR 53 tooth rear sprocket and QX-RING 520SRX2 chain.

New 520 pitch 14 tooth sprocket on the left, Original 428 pitch 17 tooth sprocket on the right

Original 428 pitch 54 tooth sprocket on the left, New 520 pitch 53 sprocket on the right